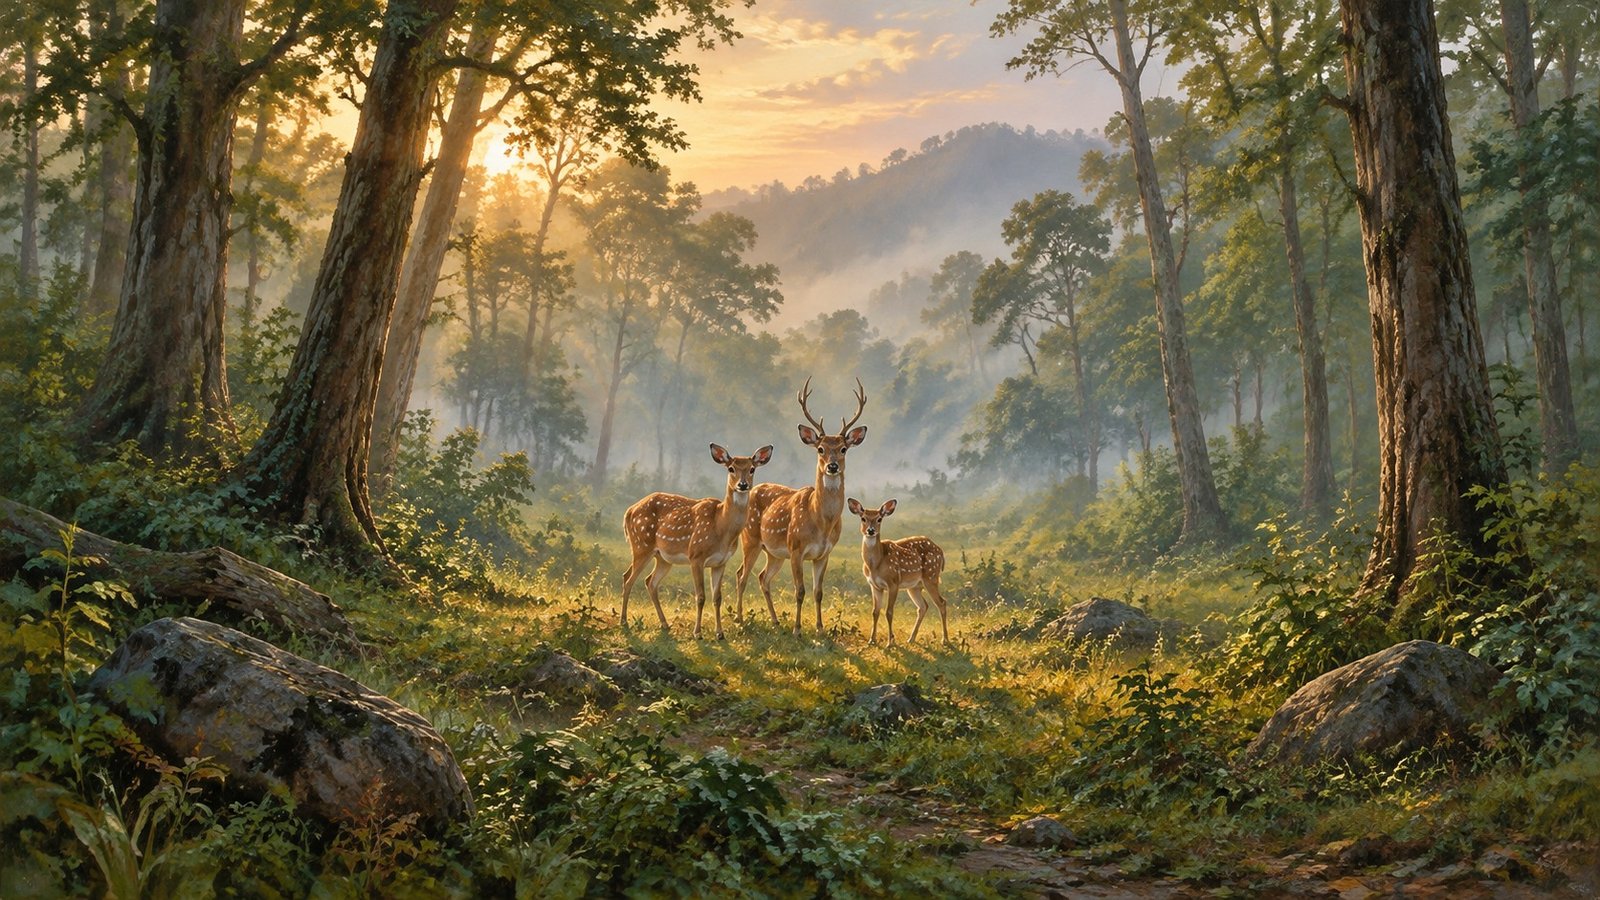
A deer stands beneath a tree. You have enough reach to fill the frame with its face, but the roots, the clearing and the soft layers of forest are part of what made you raise the camera. Before you zoom in, pause. There may be another photograph here: one in which the animal belongs to a place rather than appearing against an anonymous blur.
An environmental wildlife portrait gives the habitat a deliberate role in the picture. It does not need an unusual species, a dramatic encounter or a new lens. It asks a different question from a close portrait: what should the viewer understand about this animal’s surroundings? This guide is about making that decision in the field, then carrying it through framing and image selection. The examples below are practice scenarios, not accounts of particular Katrivia sightings.
Start with a relationship, not a focal length
An environmental photograph is not simply a wildlife image made at the widest setting on a zoom. Including more scenery is useful only when that scenery contributes something. A trunk can show scale. Repeated grasses can explain concealment. A clearing can give a walking animal somewhere to go within the frame. Without a reason, extra space can become visual clutter.
Before changing settings, finish this sentence: I want to show the animal in relation to this part of the forest. Your answer might be its small size beneath tall trees, its position at the edge of an opening or the way its shape repeats a curve in the branches. You are choosing a visual relationship, not proving a biological theory. Do not claim that a single photograph explains why an animal chose that place.
The Nikon profile of wildlife photographer Gillian Overholser offers a useful distinction: background details can add to a portrait rather than merely distract from it. Use that as a question to ask of your own scene, not as a fixed recipe to copy.
Decide what the viewer should notice first
A small animal can still be the subject of a photograph. The practical test is whether someone can find it and then understand why the surrounding space matters. Size alone does not settle that. A clear outline, a different tone or an uncluttered patch behind the head may be enough to give the eye a starting point.
Look at the scene without staring directly at the animal. Where does your attention go? If a bright strip of sky at the edge keeps pulling you away, consider whether your available framing can exclude it. If the animal disappears into a complicated pattern, wait for a clearer moment rather than assuming a wider composition will solve the problem.
Try a quick viewfinder exercise: look at the whole rectangle, locate the subject, then trace a path through the rest of the scene. If every corner demands equal attention, simplify one element. There is no need to force every image into a minimal style. A busy forest can remain busy, provided the picture gives the viewer a way into it.
Work from the viewpoint you are allowed to use
On a safari, your viewpoint is constrained by the route, the vehicle, the other passengers and the guide’s decisions. Accept those limits at the start. Do not step out, lean beyond a safe position or ask a driver to leave a permitted route for a cleaner background. A composition is an option, not a reason to override a safety instruction.
From your seat, look for the changes already available: a modest adjustment in framing, a different orientation or a moment when the subject enters a clear gap. Ask whether a proposed camera movement will block someone else’s view. If a wider photograph would include a neighbour or part of the vehicle, another frame may be the honest outcome.
The guide to photographing from a safari vehicle covers support and working space in more detail. Here, the point is narrower: use the composition the lawful, safe viewpoint permits. You do not need to manufacture a perfect angle.
Choose how much habitat earns its place
Make an initial frame, then consider a slightly wider one if the sighting continues and conditions allow. Compare what you gained. Did a tree base complete the picture? Did a second layer of forest make the space feel deeper? Or did the wider view mostly add a distracting road edge and broken shapes?
A useful field exercise is to make a close view and a habitat view from the same permitted position. Do not treat one as the correct answer. They may tell different parts of the same encounter. The close view can concentrate on a gesture; the habitat view can explain the setting. If the wider frame says nothing new, keep the stronger photograph rather than widening for the label.
Canon’s safari photography guidance notes the role of standard zooms and wide-angle lenses in showing animals in their environment. That does not mean you must move closer or buy another lens. Start with the framing your present equipment and safe distance make possible.
Give the animal room without making the frame empty
An animal looking toward the edge can feel visually cramped even when there is plenty of space elsewhere. Try leaving room in the direction it faces or moves. Then look at what fills that room: an opening, a path through vegetation or a rhythm of trunks can make the space useful rather than vacant.
Off-centre placement is a starting point, not a compulsory grid exercise. A centred subject can work when the surrounding shapes support it. Equally, moving the subject to a third of the frame will not rescue an unrelated background. Judge the actual arrangement rather than whether you have obeyed a composition rule.
Check the edges before making the next frame. A chopped trunk or a bright fragment of another animal can feel accidental. Sometimes those elements cannot be excluded without losing something more important. Make the compromise consciously. Later, you can compare the versions and decide which trade-off serves the picture.
Use layers, but keep a route through them
Foreground foliage can suggest that the viewer is looking into the forest. A middle layer can hold the animal, while distant trees establish space. These are possible tools, not a requirement to fill every photograph with three neatly separated zones.
Ask whether each layer helps the subject remain readable. A soft branch at the edge may create a useful frame; a thick shape across the face may hide the part of the animal that carries the photograph. Do not assume that every obstruction is a mistake, either. Concealment can be part of the visual idea if the animal is still discoverable and the surrounding scene makes sense.
Try naming the job of a foreground element. Is it creating depth, guiding attention or simply occupying space? If you cannot find a useful job, see whether a small change in your camera’s aim removes it. If the only way to remove it is to disturb the animal or vegetation, keep the obstruction or leave the photograph unmade.
Keep light and background in the same conversation
A beautifully lit animal against a distracting background can still be difficult to photograph. So can a pleasing landscape in which the subject has no visible separation. Look at the animal and its setting together instead of solving them as unrelated problems.
In a patchy forest scene, notice where the bright areas sit in the rectangle. Can you keep a glaring patch near the edge out of the composition? Does a darker area behind the animal help its outline read? These are questions for the scene in front of you, not promises that one kind of light produces better images everywhere.
Review a frame when it is safe and appropriate, checking the subject as well as the bright parts of the habitat. Do not spend the whole sighting looking at the screen. If the range of brightness defeats the picture you imagined, choose a simpler composition or accept a different interpretation. You are not required to force every part of the forest into one file.
Choose settings to support the picture you want
There is no single aperture or shutter speed for environmental wildlife photography. A standing animal, a walking animal and a bird moving through the frame ask different things of the camera. The amount of habitat you want to show also changes from scene to scene.
Start by deciding what must remain readable. You may want the animal to be clear with the forest only suggested, or you may want more of the setting to hold detail. Compare the result from your own camera rather than assuming that a setting used in someone else’s photograph will reproduce their scene. Distance, equipment and the arrangement of the subject and background are not identical.
Keep your attention on whether the animal is acceptably sharp and whether the habitat looks as intended. If you change a setting to gain one quality, check what happened to the others. Avoid making several changes at once while learning; one deliberate adjustment is easier to understand in the evening than a string of hurried guesses.
Wait for a useful gesture, not a performance
The scene may already be well arranged, with only the animal’s posture making it difficult to read. If the guide permits waiting, observe quietly. A head turn, a pause in a gap or a clearer separation between animals may give the composition a different shape. None of those moments is owed to the photographer.
Do not call, clap, feed, play sounds or otherwise provoke a response for the picture. Eye contact is not a requirement for an environmental portrait. A side view can connect a subject to its surroundings; a receding animal can sometimes make a useful image too. Work with what happens naturally and follow the guide’s instructions.
Also resist the urge to narrate intention from a gesture. A raised head does not by itself prove fear, curiosity or recognition. You can describe a visible posture in a caption without claiming to know the animal’s thoughts. That restraint keeps a photograph’s story connected to what you actually observed.
Practise with an ordinary sighting
Imagine a deer standing near the edge of a clearing. Treat this as an exercise, not a predicted encounter. Your first frame might be a straightforward portrait. For the second, include the nearest complete tree trunk and enough open ground to place the animal. For the third, consider a vertical frame if the height of the trees is what interests you.
After each change, ask what the habitat added. The wider version might show scale, while the vertical version might feel too crowded at the edges. Or the first portrait might remain the strongest because the setting contributes little. The exercise has succeeded if you can explain the difference, even when you prefer the close view.
You can practise the same way with photographs already on your computer. Find a wider original file and compare several non-destructive crops. This is a framing exercise, not permission to invent surroundings or to present a constructed scene as an observed wildlife encounter. Keep the original so you can revisit the decision.
Edit for the relationship, not only the animal
At the evening review, first judge the full image at a normal viewing size. Can you find the subject, and does your eye have a reason to stay with the habitat? Then inspect the detail that matters. A technically sharp file can still have a weak composition, while an appealing arrangement can still fail if the subject is unreadable.
Compare neighbouring frames side by side. Choose the version in which the animal, the light and the surrounding shapes work together. Try writing a plain caption before choosing: deer at the edge of a wooded clearing tells you something visible; a dramatic story about an unseen threat may go beyond the evidence.
Keep a short note about one successful decision and one thing to watch next time. That turns the review into a field exercise rather than a contest between files. For broader learning habits, the beginner safari photography guide covers review, focus and preparation. Environmental composition is one specific skill to practise within that wider routine.
Let the forest remain part of the photograph
You do not have to return from every safari with an environmental portrait. Some scenes suit a close view, some allow a wider image, and some are better watched without the camera. A useful aim is to notice the choice before automatically filling the frame with the animal.
For a future trip, choose one modest intention: make a habitat frame when the scene and safe viewpoint allow it, then explain why that frame works. If you want to discuss a wildlife photography trip with Katrivia Expeditions, use the phone or WhatsApp contact shown in the website header. Ask about the current itinerary and guidance rather than assuming any particular workshop or sighting is included.
Frequently Asked Questions
What is an environmental wildlife portrait?
It is a wildlife photograph in which the surroundings have a deliberate role. The animal and its habitat need to work together in the composition; simply including more empty space does not settle that.
Do I need a wide-angle lens?
Not necessarily. Begin with the framing available from your safe, permitted viewpoint and current lens. Do not approach wildlife merely to make a wide-angle photograph.
How small can the animal be in the frame?
There is no fixed percentage. Judge whether the viewer can find it and understand its relationship with the setting at the size the image will be viewed.
Which camera settings should I use?
Choose for the actual movement, light and amount of habitat you want to show. Check the result on your camera instead of treating a borrowed aperture or shutter speed as a universal preset.
Should I remove branches that block the animal?
Do not alter the habitat or disturb wildlife for a cleaner photograph. Work with a permitted framing change, wait quietly if appropriate, or accept that the scene may not produce the picture you wanted.
Can I call to get an animal to look toward the camera?
Do not provoke a response for the photograph. Follow your guide’s instructions and work with naturally occurring behaviour. A portrait does not require eye contact.
6 Responses