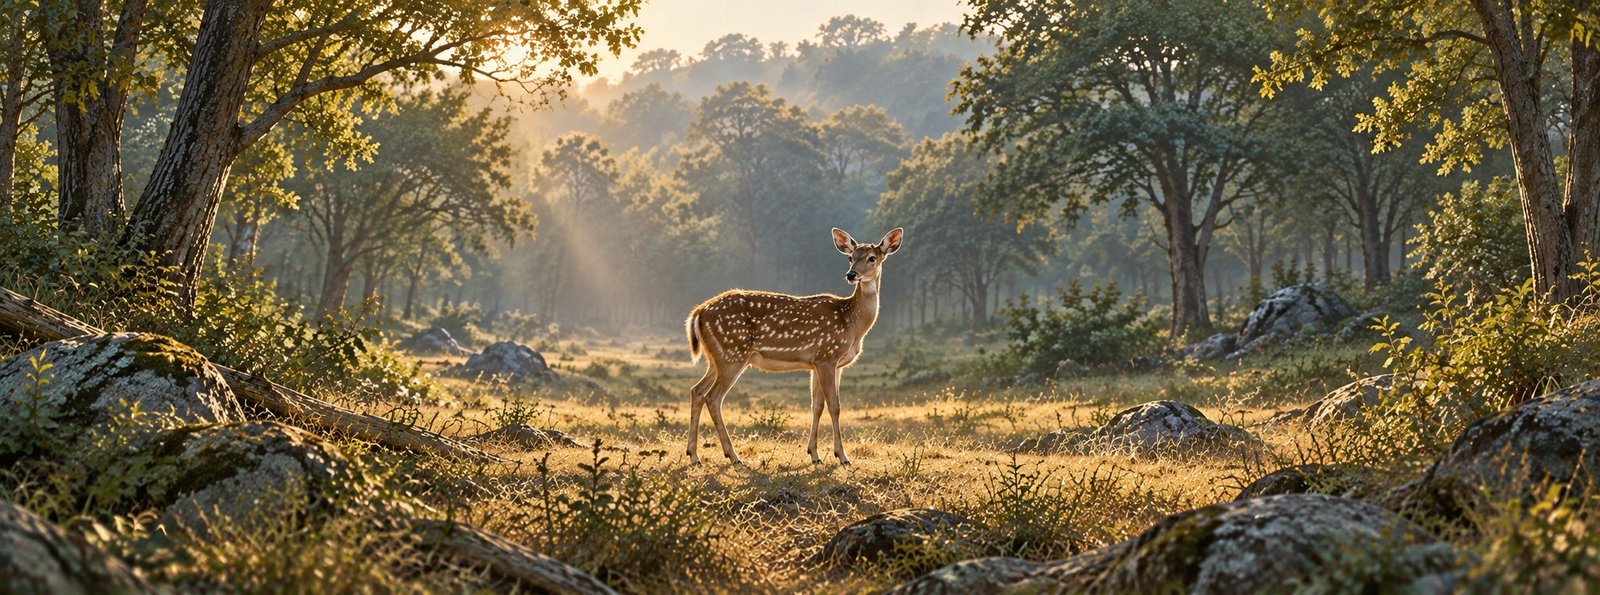
Imagine a deer standing at the edge of a clearing. The face is in shade, but a narrow line of light runs along the ears and back. Behind it, the forest seems to glow. Your camera may offer a bright face and a washed-out clearing, or a rich background with an animal that is almost black. Neither result is automatically wrong. The useful question is which photograph you meant to make.
Backlight asks for a different kind of attention from an evenly lit portrait. Instead of trying to reveal every marking, you can work with an outline, a bright edge or the separation between layers of forest. Start by choosing what needs to remain visible. Then give that choice priority in your exposure, focus and framing.
Choose between detail, rim light and silhouette
Backlight means that the main light is coming from behind the subject, relative to the camera. It does not describe a single finished look. A partly shaded animal with a luminous edge is a different picture from a dark, graphic silhouette. Trying to make both at once can leave you with an uncertain compromise.
For a detail-led portrait, the shaded face still needs enough information to carry the photograph. For a rim-light picture, the illuminated outline can become the main attraction, even if some body detail falls away. For a silhouette, shape matters more than fur texture or an eye catchlight. Decide which of these you are attempting before changing settings.
You can make another interpretation if the sighting allows, but complete one thought first. A deliberate dark frame is more useful than a succession of small exposure changes made without a visual goal.
Find a background that makes the light readable
A glowing edge can disappear against a bright patch of sky. The same edge may become clear when it falls against a darker tree or shaded vegetation. Look behind the animal rather than concentrating only on the animal itself. Ask where the light is visible and where it merges with the background.
This does not mean that every backlit picture needs a black background. A pale, misty clearing may suit a softer photograph. The important distinction is whether the background supports the intended result. A silhouette needs enough contrast for the outline to read; a delicate rim needs somewhere to show its brightness.
Work only from your permitted position. You may be able to change the composition by adjusting the lens or shifting your camera within your own space. You may not be able to separate an ear from a branch. If the available angle does not work, recognise the limit instead of asking anyone to crowd the animal or leave an allowed route.
Set exposure around what you want to preserve
A camera meter offers a starting interpretation, not a statement of intent. A large bright area can influence the suggested exposure differently from a frame filled with shaded fur. Reframing can therefore change an automatic exposure even when the light on the animal appears similar.
For a silhouette, begin by preserving the appearance of the brighter background and allowing the animal to become dark. Nikon’s guide to photographing silhouettes describes this approach: expose for the background while keeping focus on the subject. Check whether the outline is actually recognisable, rather than accepting darkness as sufficient.
For a rim-lit portrait, inspect the illuminated edge as well as the face. Brightening the shaded body until it looks conventionally lit may sacrifice the fine edge that attracted you. Make a test frame when there is time, then adjust towards the balance you want. There is no single compensation value that suits every background, coat colour and camera.
Know what your controls are changing
Exposure compensation behaves according to the exposure mode and settings in use. Before the trip, check your camera’s manual and practise with a backlit object near home. Confirm which setting changes when you turn the control, including when automatic ISO is enabled. In the field, a familiar control is more useful than a sophisticated mode you are still trying to understand.
Read the preview without chasing every bright point
Look at the test image for the part that matters to your decision. Is the bright outline still shaped, or has it become a broad white strip? Can you distinguish the head from the body? Does the shaded face need more information for this particular photograph? These are more useful questions than whether the entire frame looks evenly bright.
If your camera provides a histogram and highlight warning, use them as checks alongside the image. They need interpretation: a bright sky opening and a bright rim on the animal do not have the same importance to every composition. A warning is a reason to inspect what is affected, not an instruction to darken everything without looking.
A tiny rear-screen preview can also make a weak silhouette look convincing. Enlarge the subject when the sighting is quiet and check the edge, focus and separation. Do not spend a changing encounter examining every frame. Make a brief check, correct the biggest problem and return your attention to the scene.
Place focus where contrast is useful
A shaded face can be difficult for autofocus to distinguish from the forest behind it. Watch the actual focus result, even when the camera displays a reassuring detection box. A bright branch crossing the animal may be more prominent than the feature you wanted.
For a silhouette, the boundary between the dark subject and bright background can offer a useful focusing target. Nikon suggests trying the subject’s edge when focus is difficult. Choose an area that belongs to the animal rather than a nearby twig, and check that the selected focus area stays there as you reframe.
For a detail-led portrait, aim for the feature that needs to be clear, often the nearer eye when it is visible. Use the focus method you know how to control. Manual focus may help in some situations, but it is not a requirement and can be difficult with a moving animal. A short, deliberate sequence gives you something to assess without turning the entire sighting into a prolonged burst.
Let the outline explain the animal
In a silhouette, an eye or coat pattern may no longer explain what you are looking at. The photograph depends more heavily on the head position, ears, legs and gaps between forms. A head turned into the body can become an indistinct shape. A small natural change in posture may make the same subject much easier to read.
Look for these changes without directing them. Wait for the animal’s own movement; do not call, whistle, play sounds or seek a reaction. If two animals overlap, the frame may look like one confusing mass. A moment of separation can matter more than another change to exposure.
Check the ground line too. Dark legs merging into a dark bank can leave an animal looking cut off. You cannot fix every overlap from a restricted viewpoint, but you can avoid making the problem worse with a crop that removes the remaining clues. Leave enough room to understand the gesture.
Control flare without losing the moment
Backlighting can bring flare and a washed-out veil across the image. Sometimes that softness supports the atmosphere; sometimes it hides the subject. Judge the effect in the photograph rather than treating every trace of flare as either a fault or a creative success.
Nikon’s backlighting guidance discusses using existing elements to block direct light and reduce flare. On safari, a tree may already screen the light from your permitted viewpoint. A small framing adjustment may help, but the angle available to you remains a limit, not a reason to reposition recklessly.
Do not deliberately aim at the sun or look at it through an optical viewfinder. You do not need the solar disc in the composition to make a backlit photograph. Work with the light on the subject and follow your camera maker’s safety guidance. If direct glare prevents comfortable, safe viewing, choose another frame.
Keep haze as a layer, not an excuse
Mist or naturally present dust may separate the forest into pale and dark layers. Before making the animal larger in the frame, ask whether those layers are the reason the scene is interesting. A wider composition may allow the light to describe the setting as well as the subject.
The difficulty is keeping a clear route through the picture. A luminous patch can attract more attention than the animal. Look for a simple relationship: dark subject, lighter opening, quieter trees beyond. If the brightest area pulls the eye straight out of the frame, try a different crop or wait for a natural change.
Never create dust for a photograph or ask a driver to stir it up. Work with conditions already present. For more on deciding how much setting belongs in the image, read the guide to environmental wildlife portraits. Here, the particular task is to make the direction of light readable within that setting.
Build one controlled practice sequence
Consider this hypothetical exercise with a calmly standing animal viewed from an allowed position. First, make a frame that protects the appearance of the bright background. Check whether the subject’s outline communicates anything. If the head merges with a tree, exposure alone is unlikely to solve the problem.
Next, if the animal remains settled, make a slightly brighter interpretation to see whether the shaded detail adds something useful. Keep the composition similar so that you are comparing exposure choices, not two unrelated pictures. Finally, make a wider frame if the surrounding light deserves a role.
That is enough for a useful exercise. You are testing three intentions, not hunting for a universally correct histogram. Stop when the animal moves away or the situation changes. The lesson can come from a common subject in ordinary light; it does not depend on a rare sighting or a dramatic sunset.
Review the light, then make restrained adjustments
Back at a larger screen, compare frames with the same intended result. Judge silhouettes against other silhouettes before deciding whether a brighter portrait is stronger. Ask whether the outline reads immediately, whether the important edge is sharp and whether the background supports it.
If you work with raw files, test a modest adjustment to the shaded areas and inspect the result at a useful size. Do not assume that every dark area contains clean, recoverable detail. If brightening it weakens the outline or makes the image look strained, the darker interpretation may be the more honest choice.
Colour deserves similar restraint. Warm light can be part of the scene without making every leaf orange. Keep a version near your starting interpretation while experimenting, so you can compare rather than adjusting endlessly. The aim is to support the light you photographed, not manufacture an encounter that the file does not show.
Take one clear lesson into the next sighting
Choose a specific improvement: notice the background sooner, recognise an unreadable outline, or check the bright edge before lifting the face. A small, named lesson is easier to use in the forest than a long list of settings.
Backlight does not make an ordinary composition strong by itself. It gives you another way to describe an animal and its surroundings. When the shape, exposure and background agree, even a quiet moment can hold your attention. When they do not, letting the frame go is part of learning to see.
Frequently asked questions
Does backlight mean the animal must be a silhouette?
No. A backlit picture can retain shaded detail, emphasise a bright rim or become a silhouette. Choose the intended result before adjusting exposure. A dark subject is useful only when its shape and place in the frame communicate clearly.
What exposure compensation should I use?
There is no universal value. Start from a test frame, inspect the area you want to preserve and adjust deliberately. Check how compensation works in your camera’s current mode, especially with automatic ISO, before relying on it during a sighting.
Where should I focus for a silhouette?
Keep focus on the subject. Its edge against the brighter background may offer a useful target when the shaded interior is difficult to focus on. Confirm that the camera has not selected a branch or the distant background instead.
Do I need the sun in the photograph?
No. Light from behind the animal can create the effect while the sun stays outside the frame or behind existing cover. Do not look at the sun through an optical viewfinder or deliberately point the camera at it for this exercise.
Should I brighten every shadow during editing?
No. Dark areas can be part of the intended design. Try a restrained adjustment and compare it with the original. Keep it only if the added detail improves the photograph without undermining the outline or creating distracting image-quality problems.
Can I practise this without a safari?
Yes. A backlit leaf or an object near a bright window can help you understand exposure and focus controls. Use safe, comfortable light rather than looking towards the sun. Learn the controls first, then bring that familiarity to wildlife photography without disturbing animals.