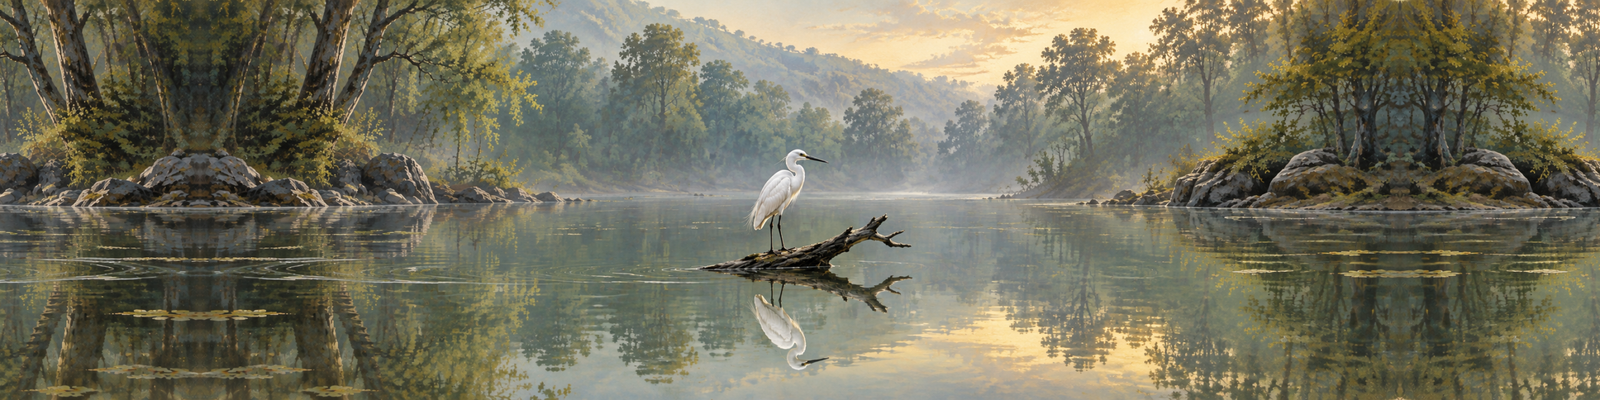
A bird beside water can give you two subjects to compose: the animal and its reflection. Sometimes the second is a clear outline. Sometimes it is a broken patch of colour that disappears before you finish framing. The useful question is not whether the water looks like a mirror. It is what the reflection contributes to the photograph you can make from your permitted position.
Reflection photography asks for a different kind of attention from a tight wildlife portrait. You need to watch the space below the animal, the edge where land meets water and the relationship between a moving subject and a changing surface. This guide offers a practical way to work through those decisions. It does not promise sightings, particular water conditions or access to any shoreline.
Decide whether the reflection is the subject or a supporting element
Start by describing the picture you want in a sentence. You might want a recognisable bird above a nearly complete reflected shape. You might prefer a small animal within a wider pattern of trees and water. Or you might be interested mainly in the broken colours below it. Those are different intentions, and each asks for a different amount of space.
For a paired portrait, the animal and reflected outline need to read together. For an environmental frame, the water can establish the setting without duplicating every detail. For an abstract, the reflection may carry the image while the animal becomes a small anchor. Decide what matters before repeatedly zooming between tight and wide views. You can change your intention when the scene changes.
Read the water before committing to a frame
Watch a small area of the surface. Does it hold a clear shape, divide it into bands or scatter it into unrelated highlights? Look at the water directly beneath the animal as well as the surrounding area. A promising reflection in one part of a pool does not establish that the whole surface will behave the same way.
Canon’s water-photography guidance distinguishes clear reflections on still water from more abstract effects on moving water. Use that distinction as a choice, not a standard of success. If ripples interrupt the outline, ask whether their pattern makes an interesting photograph instead of waiting indefinitely for a mirror that may never appear.
Keep your observation separate from an explanation you cannot establish. You can see that a reflection has broken up without claiming to know which distant movement caused it. Concentrate on the visible pattern and the animal’s position within it.
Leave room for the reflected shape before tightening the crop
A familiar wildlife habit is to fill the frame with the animal. For a reflection pair, check the lower edge before taking that last step with the zoom. Include enough water for the reflected head, body or other shape you want to preserve. If the animal changes posture, the space you need may change too.
Make an intentionally wider reference frame when the opportunity allows. Then decide whether a tighter version improves the picture. Avoid a crop that almost includes the whole reflection but loses an important part without a clear reason. A deliberately partial reflection can work; an accidental edge cut is a different decision. Look at the entire outline rather than only the sharpness of the animal’s eye.
Treat the waterline as a compositional decision
The division between animal and reflection can become a strong visual line. Try placing it centrally when the paired shapes are the point of the photograph. Try shifting it when the surrounding water or background deserves more space. Neither arrangement needs to follow a rule simply because a grid appears in your viewfinder.
Check whether the bank, branch or patch of mud creates an awkward interruption. A dark strip may separate the two shapes clearly, or it may conceal the connection between them. Work with what is visible from the position you are allowed to use. You do not need to remove vegetation, disturb the water or ask for the animal to be moved to simplify the line.
Use camera height only within a safe, permitted position
Canon’s guidance suggests experimenting with camera height because different angles can change how a reflection is framed. On a wildlife outing, that experiment has a firm boundary: remain within the guide’s instructions, the viewing arrangement and your own safe position. A lower viewpoint is an option, not permission to lean out of a vehicle or boat, step towards an animal or approach an unstable bank.
If a modest adjustment is safe and allowed, compare the relationship between the animal, waterline and background. Do not assume that the lowest position is automatically the most effective. If no adjustment is possible, use focal length and framing to work with the view you have. Missing a preferred angle is a normal photographic limit, not a problem that needs solving through access.
Make the animal’s gesture and its reflected outline work together
A reflection can become easier or harder to read as the subject changes posture. Watch how a head turn, a lifted foot or the separation of a wing changes the paired shapes. You are looking for a relationship that explains itself within the photograph, rather than merely proving that water was present.
Wait for natural movement. Do not call, whistle, play sounds, throw anything or seek a reaction. Avoid treating a photograph as more important than an undisturbed animal. If the subject moves away from the reflection, you can make a different frame or stop. The picture does not need a dramatic gesture to justify the time spent watching.
When several animals overlap, look at the reflected shapes as carefully as the actual bodies. An arrangement that looks clear above the water may become confusing below it. A smaller group or a quieter part of the scene may give you a more readable result.
Give focus a specific task
Decide which feature needs to be clear. In a conventional paired portrait, that will often be the actual animal. For a reflection-led abstract, the reflected shape may be the part you want to assess. Do not let a bright patch on the water quietly become the focus target merely because it is easy for the camera to see.
Use the focus method you can control and check the result when the moment allows. Look for the intended detail at a useful magnification rather than assuming that a small preview proves success. If the focus system keeps choosing an unwanted foreground edge, simplify the target or use a more selective method available on your camera. There is no requirement to use a particular detection mode.
Keep the focus question separate from the appearance of the water. A distorted reflection is not automatically a focusing error. Ask whether the actual animal is clear, whether the reflected pattern is the one you intended and which part genuinely needs another attempt.
Choose motion treatment for a moving subject, not an empty landscape
A still-water landscape recipe does not automatically suit wildlife. The animal may move while the surface looks calm. Begin with a shutter choice that gives you a reasonable chance of recording the gesture you want, then inspect the result. Do not adopt a long exposure simply because it produces attractive water in another photograph.
If you deliberately want motion, make that intention explicit to yourself. You might accept a softer gesture or a less literal reflection as part of an abstract. Keep a more straightforward reference frame when possible, so you can compare the choices later. A blur you chose and a blur you failed to notice are different outcomes, even if both remain worth examining.
Check bright water without making the whole scene flat
Look at the animal, the reflected shape and the brightest surrounding patches as separate parts of the frame. Ask which of them contains detail you want to retain. Use your camera’s preview and exposure aids to assess that intention, then make a measured adjustment if needed. Avoid changing settings repeatedly without knowing which part you are trying to improve.
A small bright sparkle does not need to dictate every decision. Equally, a reflection that disappears into a broad featureless patch may not support the photograph you intended. Check the important areas rather than treating the water as one uniform tone. Keep your review brief enough that you can return attention to the animal and the guide.
Let broken reflections become a different photograph
A literal reflection is only one possibility. In Nikon’s bird-photography feature with Mike Corrado, examples show both relatively still reflected textures and more abstract reflections when the water changes. The useful lesson is to look at what the surface is offering rather than judge every frame against perfect symmetry.
Try giving the pattern more room while keeping a clear anchor, such as the animal’s body or a recognisable reflected shape. Watch the edges for bright fragments that pull attention away from that anchor. You can also choose a tighter frame that removes most of the literal scene. Make that choice deliberately, and describe the finished image honestly rather than presenting an abstract as a precise record of appearance.
Practise a small comparison without manufacturing a wildlife scene
Consider a hypothetical bird visible from an approved viewing point beside a pool. Begin with a wider frame showing the bird and its full reflection. Make another with the waterline in a different position, without changing your physical access. If the surface becomes rippled, make a third frame that gives the broken pattern more space. This is an exercise outline, not a report of a Katrivia sighting or itinerary.
Change one compositional idea at a time so the comparison has a clear question. Did the central pair feel balanced? Did the wider view explain the habitat? Did the abstract retain enough structure to hold attention? If the animal leaves, end the exercise. You can practise framing and reflective surfaces in a permitted setting without arranging a wildlife encounter or placing objects near an animal.
Record a short learning note after the outing: the intention, the framing change and what you would try next. Avoid turning the note into a guarantee about a location or season. One opportunity is evidence of that opportunity, not a promise for another visit.
Review the pair, the edges and the honesty of the result
During selection, compare frames for the relationship you intended. Check the animal’s gesture, the readable extent of the reflection, unwanted edge cuts and distracting highlights. A tighter portrait may be stronger than a weak reflection pair; the presence of a reflection is not a reason to keep every frame.
Make restrained adjustments that support the photograph you recorded. If you create a composite, add a reflection or otherwise build a scene, distinguish that result from an ordinary wildlife photograph. Do not allow a caption to imply an encounter or condition you did not photograph. For the wider framing decisions around an animal and its surroundings, read the separate guide to wildlife environmental portraits.
A useful reflection photograph does not have to be perfectly symmetrical. It needs a clear reason for the water to be in the frame. Leave the outing with that reason understood, even if the picture you keep is quieter than the one you first imagined.
Frequently asked questions
Does a wildlife reflection need perfectly still water?
No. A clear mirrored outline and a broken reflected pattern are different creative choices. Decide which one the actual scene supports. Do not disturb the water or animal to create a preferred surface.
Should I put the waterline in the middle?
Try it when the paired shapes are the main idea. Also compare a frame with more room above or below. Choose the relationship that reads clearly rather than treating a grid position as compulsory.
Should I focus on the animal or the reflection?
Give focus the task your intended picture requires. A paired portrait may depend on the animal’s detail, while an abstract may depend on a reflected shape. Check the result instead of assuming that a bright water surface is the right target.
Do I need to get close to the water?
No photograph requires you to leave a safe, permitted position. Follow local guidance and the viewing arrangement. Work with framing from the access you have, or leave the picture unmade.
Will a long exposure improve the reflection?
Do not assume so. Wildlife can move even when the water looks calm. Choose a motion treatment for the actual subject and your intention, then assess the frame. A landscape example is not an automatic wildlife setting.
What if the reflection disappears before I am ready?
Return attention to the scene rather than trying to recreate it. You may find a different composition, a useful observation or no photograph. Waiting and stopping are both part of making a considered wildlife image.