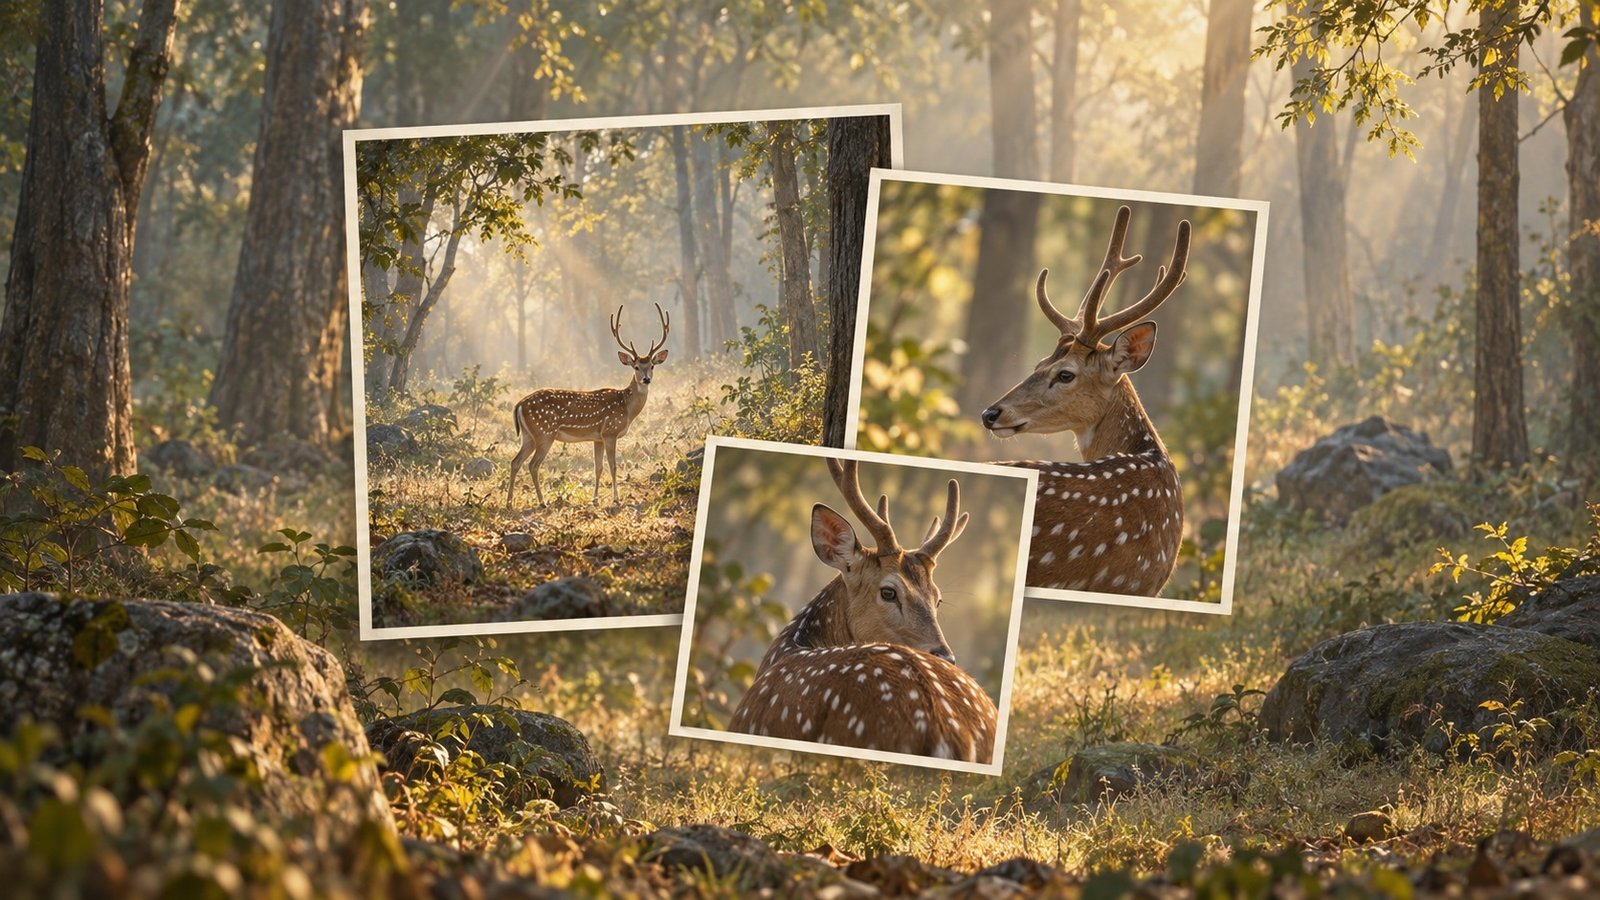
A safari can leave you with a card full of photographs and a surprisingly difficult question: which frames deserve your attention? During a sighting, everything can feel important. Back at the computer, a row of almost identical images may make the choice harder rather than easier. The moment you remember most vividly is not necessarily the photograph that communicates it most clearly.
Image selection is a different skill from making an exposure. It asks you to compare small differences, recognise the purpose of a frame and build a group of pictures that does more than repeat your favourite subject. The workflow below is practical guidance for reviewing your own files, not a description of a particular Katrivia workshop or a promise that every sighting produces a finished story.
Decide What You Are Selecting For
Before assigning stars, name the immediate task. Choosing a photograph for a small print is different from assembling a trip diary, preparing a portfolio or recording an unfamiliar bird for later identification. One frame may belong in your personal archive without belonging in the selection you share. You do not have to make every decision at once.
For a first review, a useful aim is to find pictures worth revisiting. Leave the final portfolio decision for a separate pass. This gives an interesting but imperfect frame somewhere to go without forcing you to call it either a masterpiece or a failure. A simple label such as “review” can be enough if you use it consistently.
Also separate selection from file deletion. You can decide not to develop or share a photograph while retaining its original. Before removing files, check your storage and backup arrangements and understand the software command you are using. Do not make an irreversible cleanup the first step of an evening when you are tired and still remembering the drive.
Review a Sighting as a Sequence
Begin with the photographs around a sighting together. Look at how the scene developed rather than judging a single thumbnail in isolation. A deer may turn its head, step behind a trunk and reappear in a cleaner gap. A bird may give you several nearly identical poses before one frame separates its beak from the branch behind it.
Choose a manageable group and ask what changed between the files. Did you alter the framing, did the subject move, or did you simply hold the shutter through the same composition? The answer helps you compare like with like. A wide habitat frame should not lose automatically to a closer portrait just because the animal occupies less space.
Keep context frames available while you work. They can help you understand the sequence and check your recollection, even if you never share them. A photograph that explains where the animal stood may have a different role from the one that shows its expression. Selection works better when those roles are visible rather than mixed into one undifferentiated contest.
Make a First Pass for Clear Technical Problems
Look for problems that matter to the photograph you intended. If the aim was a detailed portrait, inspect the part of the subject that needs to carry that detail. If it was an intentional movement study, judging it by the same sharpness rule may discard the point of the picture. Name the intention before deciding whether the file supports it.
Check suspected problems at a useful viewing size. A small preview can hide a missed focus point; an extreme enlargement can distract you from how the whole photograph reads. Move between a detail view and the complete frame rather than allowing either one to make the entire decision. Be especially cautious when two candidates look similar until you inspect them closely.
Use a provisional reject or review label where available, not a rushed permanent deletion. Keep a short reason when you are unsure: “focus appears behind the eye”, “branch merges with head”, or “movement may be intentional”. Those notes turn a vague dislike into something you can examine again with a clearer head.
Compare the Gesture, Not Only the Focus
Once the obvious technical misses are separated, look at what the animal is doing in each candidate. A slight change in head angle, an unobstructed eye or a more readable body position can alter the photograph. A sharp frame is worth checking, but sharpness alone does not explain why a viewer should stay with it.
Compare the visible gesture without inventing a story about the animal’s thoughts. You can describe a head turn or a raised foot. Be more careful with words such as angry, lonely or protective unless you have reliable context for that interpretation. The selection may suggest a feeling to you, but a caption should not turn that feeling into a biological fact.
Look for awkward overlaps too. In a group, one animal’s leg may appear to belong to another. A tail may merge with a trunk. An open beak can read clearly in one frame and disappear against a similar shape in the next. These are small differences that become easier to notice when the candidates sit beside each other.
Use the Frame Edges as a Second Check
After looking at the subject, deliberately examine the rest of the picture. Trace the edges. Notice bright patches, half-visible animals, cut branches and anything that pulls attention away from the part you want the viewer to read. A compelling expression can make those distractions easy to overlook during the first pass.
Do not treat every branch as a flaw. Vegetation may explain concealment, habitat or scale. The question is whether it contributes to the picture or blocks the relationship you wanted to show. A clean portrait and a layered forest frame can both succeed, but they should not be judged against an imaginary rule that every background must look empty.
If a modest crop seems worth exploring, mark the idea and keep the original. Avoid assuming that a severe crop will solve every framing problem. First ask whether another file in the sequence already gives the subject and setting a better relationship. Selecting a stronger starting frame can be a more useful decision than committing to a rescue edit.
Choose Between Near-Duplicates Deliberately
Put the closest candidates together and give each one a reason to stay. Perhaps one has the stronger gesture while another includes better habitat. If both serve different purposes, keep both in the working selection. If the difference adds nothing meaningful for your intended use, nominate a lead frame and move the others out of the active group.
Adobe’s Lightroom Classic comparison guidance describes Compare view for two photographs and Survey view for a group. Both provide rating, label and flag tools. Those are useful examples of comparison tools, not a requirement to use a particular application. Check the equivalent functions in the software you have.
Keep the labels simple enough to understand later. A star rating whose meaning changes every evening will not help much. You might use one label for a candidate and another for the final selection, then write down that convention. The useful part is the decision behind the marker, not how elaborate the system looks.
Do Not Let the Sighting’s Rarity Make Every Choice
You may feel strongly attached to a frame because you waited a long time for the sighting. Keep it as a memory if you want to. But when selecting photographs to show, ask what the picture communicates to someone who was not in the vehicle. They cannot see the anticipation, hear the conversation or borrow the excitement you felt.
A common subject in well-considered light may make a more complete photograph than a rare subject hidden behind distracting branches. That does not diminish the encounter. It separates the value of the experience from the visual strength of an individual file. Your archive can honour both without making the same picture do every job.
Try reviewing a candidate without its memorable story first. What do you notice? Where does your eye go? Can you describe why you chose it using something visible in the frame? Then bring the context back. This exercise is a way to question your own selection, not a claim that personal attachment should disappear from photography.
Build a Small Set With Different Roles
After choosing individual candidates, view them as a group. If they all show the same animal at the same distance with almost the same pose, you may have a good favourite but a repetitive set. Consider whether a wider setting, a quieter detail or a different stage of the encounter would add something rather than merely increase the count.
You do not need a prescribed number of photographs. Let the available material decide. An opening frame might establish the forest, another might show the subject more clearly, and a final image might return attention to its surroundings. These are optional roles, not a formula that requires inventing a beginning or ending the encounter did not have.
Keep the distinction between sequence and chronology clear. You may arrange pictures for visual flow, but do not imply a factual event happened in that order if it did not. A set can be visually coherent without claiming to document one continuous moment. When that distinction matters, explain it in the caption or accompanying note.
A Hypothetical Comparison From One Sighting
Imagine returning with three groups of deer photographs. In the first, the animal is close but a branch crosses the face. In the second, it is smaller in the frame and stands in a clear opening among repeated tree trunks. In the third, its head is visible but the body merges with another deer. This is an invented practice exercise, not a report of a Katrivia sighting.
For a habitat story, the second group may give you the strongest starting point. Compare the head position and background within that group, then choose the frame where the relationship is clearest. For an identification record, another file might retain information you want to keep. A personal memory might remain valuable for an entirely different reason.
The lesson is not to pick the same kind of image every time. It is to state the task, inspect the evidence in the frame and make the choice for a reason. If you cannot decide, retain the candidates and return later. Uncertainty is a useful status when it prevents you from discarding something before you understand it.
Make a Restrained Development Check
A first selection can change when you make basic development adjustments. Keep the purpose narrow: see whether a candidate supports the picture you thought you had. Work in a way that preserves the original and lets you revisit the decisions. Consult your application’s instructions if you are uncertain how its edits and exports are stored.
Ask whether the intended subject and setting still read naturally to you after the adjustment. Do not use an increasingly elaborate edit to avoid reconsidering the starting file. If you are presenting a photograph as a record of wildlife, keep track of changes that could alter what a viewer believes was present. Follow the rules of any competition or publication you later enter.
This is not a software tutorial or a universal editing standard. The practical selection question is simpler: does this frame still deserve its place when you view it beside the alternatives? If another candidate communicates the idea with fewer compromises, allow the selection to change rather than defending the first flag you assigned.
Write Captions From What You Actually Know
Keep notes about place, date and what you directly observed while the context is available. If you are unsure of a species or behaviour, mark that uncertainty and verify it before publishing a confident caption. A dramatic photograph does not need an unsupported explanation to become interesting.
Separate what the frame shows from information learned later. “The animal turned toward the vehicle” is a different statement from claiming why it did so. If a guide supplied an identification, retain that attribution in your working notes. Do not infer an exact location or behaviour from a filename you no longer understand.
Turn the Review Into One Field Lesson
Finish with a small, usable observation for the next drive. Instead of writing “take better photographs”, identify something you can watch: a background merging with the head, a cramped edge, a focus point that stayed on foreground vegetation, or a habit of making every composition equally tight. Keep the lesson specific enough to recognise in the field.
Our guide to environmental wildlife portraits develops the separate task of composing the animal with its surroundings. Here the work happens afterwards: comparing what you brought home and deciding which pictures carry that relationship. A useful review does not need to produce a perfect portfolio. It should leave you with clearer choices and one question worth taking back into the forest.
Frequently Asked Questions
What does culling mean in this guide?
It means narrowing a working selection of photographs for further attention. It does not require permanently deleting originals. Check your backup arrangements and software commands before removing files.
Should I keep only the sharpest image from a burst?
Not automatically. Compare the photograph’s intended use, gesture, framing and background as well as technical detail. A frame can be sharp without being the clearest expression of the scene.
How many images should I share from one sighting?
There is no required number here. Keep the set as small as the story allows, and give each image a different reason to be included rather than sharing near-identical alternatives.
Do I need Lightroom Classic?
No. The workflow is about comparison and judgement. Use an application that lets you inspect your files and record selections, and learn what its labels and deletion commands actually do.
What if my favourite memory is not my strongest photograph?
You can keep it for yourself. A personal archive and a public selection can have different purposes without making the encounter less valuable.
Can I postpone a difficult selection?
Yes. Mark the candidates for another review and retain the originals. Returning with a little distance can be more useful than forcing a final choice when you are tired.